
School Tycoon Upgrades Tier List (S - 揇)
Stampers and desks beat lockers - rank every pad before you click buy.
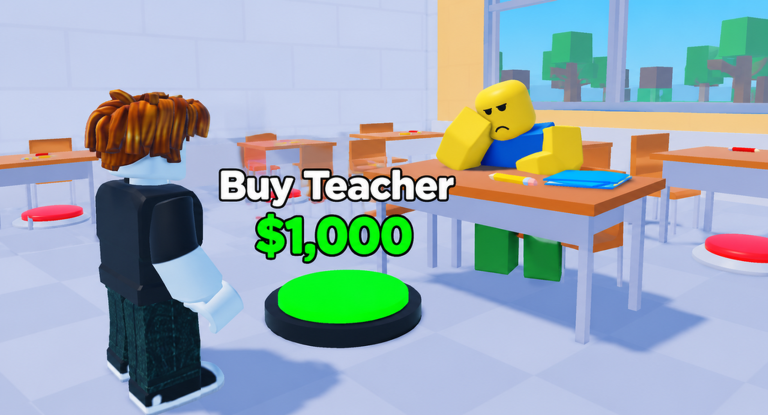
This tier list ranks the structural upgrades that define School Tycoon income: stampers, printers (including diploma-focused steps), dropper-style buttons, and desks that raise student capacity. Furniture cosmetics and pure Customize colors are called out in D-tier so you do not stall a floor. Pair staff decisions with the Staff tier list and spend order context from the Tier List Hub.
Ranks assume a free-to-play run on Shark Fin Studios LLC School Tycoon after you claim a plot and redeem any live codes. Exact button labels on your floor may vary slightly after patches; classify each pad by what it does, then match it to a letter below.
S tier - buy immediately
Higher-letter stampers (progressing toward A). Stampers are the heartbeat of homework throughput. Early lettered tiers (players often see a climb in the F-toward-A direction across the tycoon) multiply how fast collectable work appears. Whenever a stamper pad is affordable and unlocked, it outranks almost every decorative purchase on the same floor. Falling behind on stampers is the most common reason a school “feels broke” despite constant walking.
Core printers and diploma printer steps. Printers turn the school fantasy into money. The diploma-oriented printer path is especially important once it appears - it signals you are converting academic output into bankable progress. Skipping a visible printer to buy bleachers is a classic trap.
Essential desks that raise capacity. If students cannot spawn or work because desks are missing, your coins-per-minute staff investments waste potential. Desk pads that clearly increase capacity are S whenever you are at a soft cap. After buying, hire according to staff priority.
A tier - strong next buys
Mid stamper upgrades. Not every stamper jump is equal. Mid-tier steps that continue the letter climb sit in A when an S printer or desk is also available and more urgent. Still buy them before random furniture.
Droppers that feed the collect route. Buttons that add or accelerate dropper-style homework emitters belong here. They shorten dead time between collects and pair well with the habits in Make Money.
Floor unlock pads that gate the next income wing. Expanding is A when the current floor’s S items are done and the unlock is the only path to new stampers. It drops to B if you still have a cheap stamper unfinished downstairs.
B tier - solid after the engine works
Extra desks beyond the first soft cap. Once you can support a healthy student count, more desks remain good but no longer emergency buys.
Support furniture that unlocks paths. Counters, doors, or hallway pieces that literally open a route to a stamper are B (or higher if they hard-gate an S pad). Pure visual sets without pathing value stay lower.
Secondary printers. Additional print capacity after the diploma-critical steps are owned. Helpful for polish and parallel income, not your first panic purchase.
C tier - situational
Thematic classroom sets. Nice for screenshots and roleplay, weak for coins until trips and staff already pay the bills.
Duplicate convenience pads. Extra radios, posters, or clone furniture that does not change capacity or drop rate.
Early cosmetic-adjacent unlocks on a new floor. If a pad is cheap but does nothing for throughput, park it until the floor’s stampers and desks are green.
D tier - delay or skip early
Color packs, uniforms, and vanity Customize spends. Fun, permanent-looking, and terrible openers. Schedule tools are the exception when they enable field trips - treat trip-enabling schedule edits as progression, not D-tier fashion.
Expensive showpiece furniture before janitors and students. A giant lobby piece that empties your wallet while messes pile up and desks stay empty slows the entire complete school route.
Impulse buys from watching a richer neighbor. Copy their stamper depth, not their trophy shelf. Etiquette for looking around is covered in the Players Hub.
Stamper focus: F toward A mindset
Players and creator videos often highlight climbing stamper quality through lettered stages. Mentally label your next stamper as mandatory until you are on the highest tier available for that stage of the school. When two stamper pads are visible, buy the one that advances the letter progression or the larger throughput tooltip. If tooltips are unclear, buy the cheaper stamper first only when it unlocks the path to the stronger one; otherwise save for the stronger jump.
VIP or special stampers sold via gamepasses can feel like an S-tier comfort upgrade, but they are optional Robux spends. Clear free stampers before you decide.
Desks versus droppers versus printers
| Upgrade type | Primary job | When it is S |
|---|---|---|
| Stamper | Speeds / improves homework pipeline | Nearly always when behind |
| Printer / diploma | Converts school output to progress money | When newly unlocked or diploma-gated |
| Dropper | Adds collectables along a route | When collect downtime is high |
| Desk | Raises capacity for students / activity | When soft-capped |
If you can only afford one and all four are present, prefer stamper or diploma printer first, desk second when capped, dropper third, then revisit staff hires.
Floor-by-floor application
On each floor:
- List every unpurchased pad.
- Tag S - 揇 using the sections above.
- Buy all affordable S, then A.
- Hire staff that monetizes new capacity.
- Only then clear B/C.
- Leave D until the floor funds the next unlock comfortably.
Track ticks on the progress checklist. After patches, re-walk floors per the Updates Hub in case new droppers shifted the meta.
Common upgrade mistakes
- Maxing hallway decor while an F-tier stamper still sits unbought.
- Unlocking a floor, going broke, and having no desks upstairs.
- Ignoring diploma printer timing, then wondering why mid-game stalls.
- Spending code money on uniforms (Codes should feed S pads).
- Using risky auto-buy scripts instead of this list.
Related reading
- Staff tier list - students, teachers, janitors, drivers
- Make Money - how stampers feel in a live grind
- Getting Started - first printer and base buys
- Controls - finding pads and UI quickly
Master this list and your school prints cash while other plots are still wallpaper shopping.
Frequently Asked Questions
Quick answers to the most common School Tycoon questions.
What is the best upgrade in School Tycoon?
The next stamper or diploma-critical printer you have not bought yet, unless desks are soft-capping your students - then desks become the emergency S buy.
Should I buy all desks first?
Buy desks when capacity blocks staff value. Do not fill every desk pad before any stampers; alternate throughput and capacity.
Are furniture sets worth it?
After stampers, printers, desks, and core staff. Early furniture is usually C or D for income purposes.
Do stampers really go from F toward A?
Players commonly describe lettered stamper progression in that direction. Always buy the pad that advances your highest available stamper tier.
Where do field trip unlocks rank?
Schedule and bus pieces that enable trips rank as progression (high A / situational S in mid game), not as D-tier cosmetics.